How to Halo
July 24 2015
Our Halo team is headed to the Halo Championship Series (HCS) Finals! Maybe you want to watch and support the team, but wait! You’ve never played Halo, or you only vaguely saw it in the background of an MLG tournament that one time.
Maybe back in high school or college, you played a few games with your buddies, and now that it’s on the big screen you want to watch and appreciate the game on a deeper level.
Well, we're here to help you! This is your crash course on the basics of Halo competitive play. We’ll go over the fundamentals just in case you're not familiar and drill in some entry-level knowledge so that you, too, can appreciate this beautiful game.
The tournament starts at 11am PDT/2pm EDT/8pm CEST every day between Friday, July 24th to Sunday, July 26th, and it can be watched on Halo's Twitch. The teams competing are Evil Geniuses, Denial eSports, Winterfox, Counter Logic Gaming, Cloud9, OpTic Gaming, eXcellence and ourselves!
![[image loading]](/staff/Souma/tlpro/howtohalo/Combat.png)
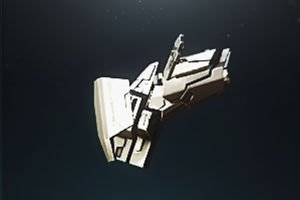
Combat in Halo is fast, calculated and often requires a ton of precision. Here are the things you need to know to keep up with a competitive game of Halo:
- Shields are displayed at the top of the HUD and will always take damage first and regenerate after a short delay.
- Health is not visible but takes damage after shield. If a player runs out of health, they will die. Health regenerates after a short delay.
- The Battle Rifle, Carbine and Magnum will kill with a headshot once shields are dropped. The Sniper will kill with a headshot even if the victim has max shield.
- Players start with a Battle Rifle, a three-round burst accurate weapon that will kill with four perfect shots.
- Grenades are critical. Frags will remove shields with close range explosions and Plasmas will kill if close enough. Frags bounce well off walls and floors while Plasmas tend to stay where thrown.
- Melee damage is based on momentum and weapon held. Two melee strikes will kill with jumping momentum, while it takes three to kill with zero momentum.
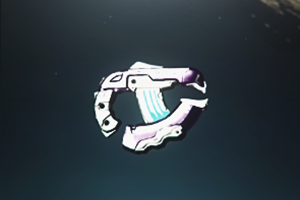
![[image loading]](/staff/Souma/tlpro/howtohalo/WeaponsandTiming.png)
All players start with a Battle Rifle (BR), but there are other weapons placed around the map that players battle for possession. The Rocket Launcher, Sniper Rifle and Energy Sword are all available in strictly controlled doses.
A well-placed rocket or sniper round will kill a player instantly regardless of circumstance* and the Energy Sword is no different. These weapons are termed “power weapons,” which means they have the ability to send an enemy to their death timer with a single shot. Needless to say, they provide their owners with a massive advantage. Good teams will always keep track of when a power weapon is slated to spawn and push areas of the map to gain control of the new weapon.
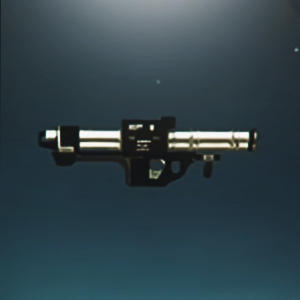 The Rocket Launcher, simply dubbed "Rockets," is a straightforward weapon. A rocket that hits the ground or a wall next to an enemy will typically kill them. Unfortunately, it is rather difficult to hit a player with a rocket, and if they aren’t near a wall or the ground it may not be possible to get a good rocket off in time. Height plays a big role when contesting a player with Rockets. With a height advantage, a player with a BR can kill a player with Rockets relatively safely. With a height disadvantage, it’s often a guaranteed death for the challenger.
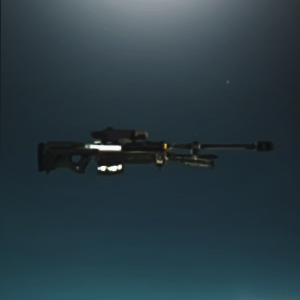 The Sniper Rifle is another beast entirely. The real workhorse of many a highlight clip, the Sniper can down an entire team in four shots. While Rockets are typically used as an offensive weapon, the Sniper is extremely useful for both preventing a push for map control as well as keeping the enemy team on respawn while the rest of your team takes objectives.
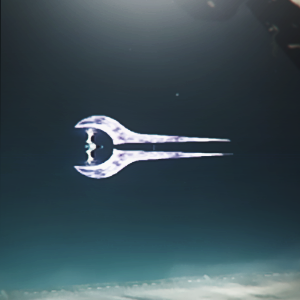 The Energy Sword is the most specialized of the power weapons. Both the Rockets and the Sniper can be used at all ranges, though naturally most effective under ideal circumstances. However, the Sword has a lunge range**. Outside of this range, the Sword is completely useless, but within range, it kills anyone in the short time it takes to lunge at them.
* Although not currently available in HCS settings, some Halo maps have an Overshield power-up which increases a player’s shield capacity for a short time. A full Overshield will absorb even headshots from a sniper round. A rocket will still kill, however.
** When the reticle turns red, the enemy is within lunge range.
There are three other weapons worth noting that are not considered power weapons. Regardless, they make a player more of a threat once equipped.
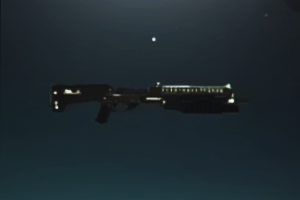 The Shotgun is available in every game type and on every map in competitive play. It does significant damage at close range and can kill with a single shot if fired at a close enough distance.
 The Sentinel Beam is only available on Warlord and is exactly what it sounds like: a beam. It will drop a player’s shield very quickly, making it quite useful for setting up kills for teammates or close-range combat.
 The Plasma Pistol is an old favorite. Dubbed the “noob combo,” a charged shot from this gun will track its target and remove all of their shield on contact, allowing for a follow-up shot from a BR or similar weapon to finish the job. It performs much like the Sentinel Beam in close combat as well.
A well-placed rocket or sniper round will kill a player instantly regardless of circumstance* and the Energy Sword is no different. These weapons are termed “power weapons,” which means they have the ability to send an enemy to their death timer with a single shot. Needless to say, they provide their owners with a massive advantage. Good teams will always keep track of when a power weapon is slated to spawn and push areas of the map to gain control of the new weapon.
The Rocket Launcher, simply dubbed "Rockets," is a straightforward weapon. A rocket that hits the ground or a wall next to an enemy will typically kill them. Unfortunately, it is rather difficult to hit a player with a rocket, and if they aren’t near a wall or the ground it may not be possible to get a good rocket off in time. Height plays a big role when contesting a player with Rockets. With a height advantage, a player with a BR can kill a player with Rockets relatively safely. With a height disadvantage, it’s often a guaranteed death for the challenger. The Sniper Rifle is another beast entirely. The real workhorse of many a highlight clip, the Sniper can down an entire team in four shots. While Rockets are typically used as an offensive weapon, the Sniper is extremely useful for both preventing a push for map control as well as keeping the enemy team on respawn while the rest of your team takes objectives. The Energy Sword is the most specialized of the power weapons. Both the Rockets and the Sniper can be used at all ranges, though naturally most effective under ideal circumstances. However, the Sword has a lunge range**. Outside of this range, the Sword is completely useless, but within range, it kills anyone in the short time it takes to lunge at them. * Although not currently available in HCS settings, some Halo maps have an Overshield power-up which increases a player’s shield capacity for a short time. A full Overshield will absorb even headshots from a sniper round. A rocket will still kill, however.
** When the reticle turns red, the enemy is within lunge range.
There are three other weapons worth noting that are not considered power weapons. Regardless, they make a player more of a threat once equipped.
The Shotgun is available in every game type and on every map in competitive play. It does significant damage at close range and can kill with a single shot if fired at a close enough distance. The Sentinel Beam is only available on Warlord and is exactly what it sounds like: a beam. It will drop a player’s shield very quickly, making it quite useful for setting up kills for teammates or close-range combat. The Plasma Pistol is an old favorite. Dubbed the “noob combo,” a charged shot from this gun will track its target and remove all of their shield on contact, allowing for a follow-up shot from a BR or similar weapon to finish the job. It performs much like the Sentinel Beam in close combat as well.![[image loading]](/staff/Souma/tlpro/howtohalo/POSandSpawns.png)
Now that the weapons are out of the way, it's time to discuss an important tactical fundamental: positioning.
Halo's positioning is governed by the same rules as most other shooters. Being in a place that offers good sightlines while remaining relatively safe is always ideal. Being in a position to assert map control and retain accessibility to other positions is also important. One of the most crucial aspects of map control is exerting pressure on the enemy team’s spawn locations. This is most notable in game types with designated bases for each team, namely Capture the Flag and Assault.
Every map has set spawn locations. While there are many points a player may spawn at, the locations are typically grouped into general areas. Some of the areas are significantly worse than others when trying to defend a base from a push. The most obvious example of this is Shrine. If the enemy controls the Sniper Hut/Ring and is pushing the flag/bomb platform, spawning in the rocks makes it difficult to get much done before dying or having the objective taken.
Now that we know how important it is to control the enemy's spawns, how does a team go about this?
When a player is on respawn, their spawn location is chosen based on the highest “weighted” spawn location. Many things affect the weight of a potential spawn location: having a teammate nearby will add positive weight to the spawns around them, while enemies, explosions and recent friendly deaths will weigh negatively on the spawn points in the vicinity. When a team is pushing for an objective or aiming for map control, their positioning is largely based upon trying to force unfavorable spawns on the enemy team.
![[image loading]](/staff/Souma/tlpro/howtohalo/Objectives.png)
There are four objective-based gametypes in competitive Halo: Capture the Flag (CTF), Assault (Bomb), Oddball, and King of the Hill.
King of the Hill is straightforward. There is a single hill that teams must control on the map. Standing on the hill yields points for every second your team controls it uncontested. The hill moves every two minutes, and teams follow suit. Moving on!
Capture the Flag is exactly what it sounds like. Each team has a flag in their base and the goal is to bring the opponent’s flag back to their base. Flag has the most iconic Halo objective mechanic: the flag toss. When you are holding the flag you move at a reduced speed and cannot fire your weapon. You can, however, throw the flag. This leads to players simply throwing the flag in front of them and running to pick it up which results in a much faster run. It adds a particular skill to running with the flag because players can vary their speed and shoot in between flag carries. Watch for exactly where the flag is being thrown; the flag will bounce off of walls and ceilings! A fumbled flag toss can result in a failed cap which can easily spiral into a lost game. When the flag is dropped, it will return to its base if it is not picked up within fifteen seconds. Picking up the flag will reset this timer, and on Warlord, simply running into your team’s flag will reset it back to its home in your base.
Assault has players bringing a bomb to the enemy base and standing in the designated area for 5 cumulative seconds. The bomb with be armed, planted, and will explode shortly after the team kills everyone around. If the bomb is dropped it will retain its progress towards arming. When picked up by the assaulting team still in the arming area it will continue to arm from where it left off. If the defending team picks up a partially armed bomb in their base, the arm timer will regress back towards zero. This regression also occurs if the assaulting team picks up a partially armed bomb outside of the arming area. There are common ways of dealing with someone arming a bomb in your base off spawn, so it is important to prioritize based on context. What separates the best players and teams from the rest of the field is their decision making in these situations. Knowing when to drop the bomb and help slay to secure an arm, and knowing when you can risk continuing the arm is fundamental to every aspiring Halo player.
Oddball is similar to a mobile hill. Your team is allotted one point for every second someone on your team is holding the oddball. Much like the bomb, you cannot use your weapon while holding the ball and there is a very high skill cap in understanding the demands of each case. Many game-changing decisions have to be made such as: when to hold the ball and trust your team; when to drop the ball and slay; when to abandon ship and toss the ball off the map for a reset; when to toss the ball to a place that is easier for your team to recover; and when to pass the ball to a teammate.
![[image loading]](/staff/Souma/tlpro/howtohalo/Maps.png)
HCS uses three maps: Lockdown, Shrine, and Warlord. If you’ve played Halo 2 you’ll recognize these maps as Lockout, Sanctuary, and Warlock with a few updates. Slayer is played on all maps, but each map has it’s own set of objective game-types as well.
***Hover over the images to view an enlarged map. Move your mouse out of the enlarged map to minimize
We’ll start with the most distinct of the three, Lockdown. The only Asymmetrical map, Lockdown features three towers around an open middle platform. Lockdown hosts Oddball and King of the HIll gametypes along with Team Slayer.
![[image loading]](/staff/Souma/tlpro/howtohalo/lockdownsmall.jpg)
Lockdown is typically the slowest map of the three, due to the difficulty in retaking key locations. Ideally a team wants to control BR tower and Snipe 3 while forcing elbow and blue spawns. With teams of similar skill, it is rare to control both towers for a full game. This leads to the map being split; one team controls BR tower and one controls snipe tower. The Sniper Rifle and Energy Sword are crucial to both holding and pushing positions so look for teams to contest their spawns. If one team has both Sniper and Sword you can usually count on the game slowing down drastically, as running at a team with a defensive setup and both power weapons can lead to a game getting out of reach quite quickly. There are three ice pillars that can be shot at to fall on Top Mid, Snipe 2, and BR 3. These can kill players, but have very loud audio cues and are fairly easy to avoid.
Shrine is home to the only Rocket Launcher in HCS and the only map with dual Sniper Rifles. These high kill, high impact weapons usually lead to some spectacular plays. Shrine’s objective game-types are Neutral Bomb and Capture the Flag, both first to three plants and captures respectively.
![[image loading]](/staff/Souma/tlpro/howtohalo/shrinehutsmall.jpg)
![[image loading]](/staff/Souma/tlpro/howtohalo/shrineringsmall.jpg)
![[image loading]](/staff/Souma/tlpro/howtohalo/shrinerockssmall.jpg)
The Ring structure on Shrine is the key to map control. Not only does it hold the Rocket Launcher, but it provides sightlines to all paths and most positions on the map as well as offering quick routes to all important areas. The team that controls Ring the longest typically wins Slayer games, and you cannot run a flag or plant a bomb with the other team controlling Ring. While Ring is crucial to all gametypes, the Sniper Hut plays a large part in setting up for objectives. In Slayer, players can spawn at either base, but in objective gametypes teams are restricted to spawning at their respective bases. If an opponent is in your Sniper Hut and you’re on respawn, which is likely to happen if the other team has Ring and Hut control, your only options for spawn points are Flag and Rocks.
With players in Ring and Hut, it's very easy to team shoot spawners in Rocks and force them to either run to Rock Ramp to try to deal with a bomb plant, or fight through the Ring and Hut players to try to stop a flag run. Shrine can slow down in Slayer, but look for pushes for Hut control and some tense fights to stop a bomb plant or flag run. There is also a beacon above the objective in both bases that, when shot, will cause a short cascade of water around the base, obstructing vision for a short time.
Warlord is by far the fastest map on the circuit. With no true power weapons and Camo spawning Top Mid, this map is all about getting up top and staying there. While all game-types are played on Warlord, both Bomb and Flag are races to 5 instead of Shrine’s 3 score cap.
![[image loading]](/staff/Souma/tlpro/howtohalo/warlordbasesmall.jpg)
![[image loading]](/staff/Souma/tlpro/howtohalo/warlordmidsmall.jpg)
Top mid offers the best view of the map, allowing a player to shoot or grenade any place on the map almost immediately. While this is a major asset when you have map control, it is a deathtrap when the other team is set up on side platforms and bases. Slayer can be a chaotic mess, with every spawn point on the map open to everyone. Objective game-types are a bit more organized when you know what to look for. The three spawn points available are base and both portals.
On Bomb and Flag game-types look for teams to try to control side platforms and then push for the objective when they have taken out the defenders at base. With a player in the base either planting a bomb or grabbing a flag, the defending team will be forced to spawn at either portal. With callouts, it’s easy to teamshoot the spawners. When trying to come back against a set up, the side bases are key, because they weigh spawns towards the nearest portal and allow your team to branch out from your base and fight back against the setup.
Oddball is similar, but all bases are fair game. Look for teams to get setup in a base and control the neighboring platforms and bases, forcing the opposition to spawn cross map and fight through a wall of fire before getting to the ball. While you don’t typically see players on big streaks on Warlord, if a player manages to get away with Camo and pick up a Shotgun it can be devastating.
***Hover over the images to view an enlarged map. Move your mouse out of the enlarged map to minimize
Lockdown
We’ll start with the most distinct of the three, Lockdown. The only Asymmetrical map, Lockdown features three towers around an open middle platform. Lockdown hosts Oddball and King of the HIll gametypes along with Team Slayer.
![[image loading]](/staff/Souma/tlpro/howtohalo/LockDown.jpg)
Lockdown is typically the slowest map of the three, due to the difficulty in retaking key locations. Ideally a team wants to control BR tower and Snipe 3 while forcing elbow and blue spawns. With teams of similar skill, it is rare to control both towers for a full game. This leads to the map being split; one team controls BR tower and one controls snipe tower. The Sniper Rifle and Energy Sword are crucial to both holding and pushing positions so look for teams to contest their spawns. If one team has both Sniper and Sword you can usually count on the game slowing down drastically, as running at a team with a defensive setup and both power weapons can lead to a game getting out of reach quite quickly. There are three ice pillars that can be shot at to fall on Top Mid, Snipe 2, and BR 3. These can kill players, but have very loud audio cues and are fairly easy to avoid.
Shrine
Shrine is home to the only Rocket Launcher in HCS and the only map with dual Sniper Rifles. These high kill, high impact weapons usually lead to some spectacular plays. Shrine’s objective game-types are Neutral Bomb and Capture the Flag, both first to three plants and captures respectively.
![[image loading]](/staff/Souma/tlpro/howtohalo/ShrineHut.jpg)
![[image loading]](/staff/Souma/tlpro/howtohalo/ShrineRing.jpg)
![[image loading]](/staff/Souma/tlpro/howtohalo/ShrineRocks.jpg)
The Ring structure on Shrine is the key to map control. Not only does it hold the Rocket Launcher, but it provides sightlines to all paths and most positions on the map as well as offering quick routes to all important areas. The team that controls Ring the longest typically wins Slayer games, and you cannot run a flag or plant a bomb with the other team controlling Ring. While Ring is crucial to all gametypes, the Sniper Hut plays a large part in setting up for objectives. In Slayer, players can spawn at either base, but in objective gametypes teams are restricted to spawning at their respective bases. If an opponent is in your Sniper Hut and you’re on respawn, which is likely to happen if the other team has Ring and Hut control, your only options for spawn points are Flag and Rocks.
With players in Ring and Hut, it's very easy to team shoot spawners in Rocks and force them to either run to Rock Ramp to try to deal with a bomb plant, or fight through the Ring and Hut players to try to stop a flag run. Shrine can slow down in Slayer, but look for pushes for Hut control and some tense fights to stop a bomb plant or flag run. There is also a beacon above the objective in both bases that, when shot, will cause a short cascade of water around the base, obstructing vision for a short time.
Warlord
Warlord is by far the fastest map on the circuit. With no true power weapons and Camo spawning Top Mid, this map is all about getting up top and staying there. While all game-types are played on Warlord, both Bomb and Flag are races to 5 instead of Shrine’s 3 score cap.
![[image loading]](/staff/Souma/tlpro/howtohalo/WarlordBase.jpg)
![[image loading]](/staff/Souma/tlpro/howtohalo/WarlordMid.jpg)
Top mid offers the best view of the map, allowing a player to shoot or grenade any place on the map almost immediately. While this is a major asset when you have map control, it is a deathtrap when the other team is set up on side platforms and bases. Slayer can be a chaotic mess, with every spawn point on the map open to everyone. Objective game-types are a bit more organized when you know what to look for. The three spawn points available are base and both portals.
On Bomb and Flag game-types look for teams to try to control side platforms and then push for the objective when they have taken out the defenders at base. With a player in the base either planting a bomb or grabbing a flag, the defending team will be forced to spawn at either portal. With callouts, it’s easy to teamshoot the spawners. When trying to come back against a set up, the side bases are key, because they weigh spawns towards the nearest portal and allow your team to branch out from your base and fight back against the setup.
Oddball is similar, but all bases are fair game. Look for teams to get setup in a base and control the neighboring platforms and bases, forcing the opposition to spawn cross map and fight through a wall of fire before getting to the ball. While you don’t typically see players on big streaks on Warlord, if a player manages to get away with Camo and pick up a Shotgun it can be devastating.
![[image loading]](/staff/Souma/tlpro/howtohalo/TournamentStructure.png)
Most tournaments use double elimination with seeded brackets. Each round will have set game types, typically in a set order. Altering gametypes is usually prioritized over altering maps. It's more likely that the same map will be played back-to-back, but rarely do you play the same game type in consecutive games. Earlier rounds tend to be best of 3 and later rounds best of 5. This coming HCS tournament, seeds are based on points earned from previous HCS tournaments (both LAN and online) from this season.
If you came here knowing little to nothing about Halo but intend to follow along while supporting your favorite team, I hope this brought you up to speed!
I just hope to get more people watching and enjoying this game. Maybe with Halo 5 we'll see a rebirth like Smash has had over the last year or so. Until then, all we can do is support the people we have now and I can’t think of a better way than having Team Liquid join the community. Hopefully people who support Liquid will take interest in the team and the game.
Thank you everyone that has read this and shown any interest in Halo. We really do appreciate you.
×